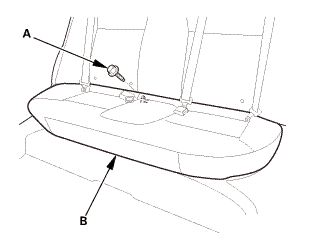
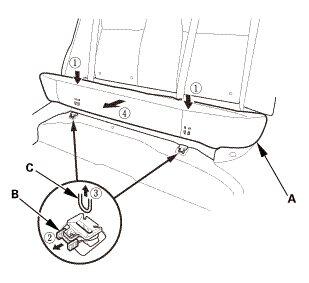
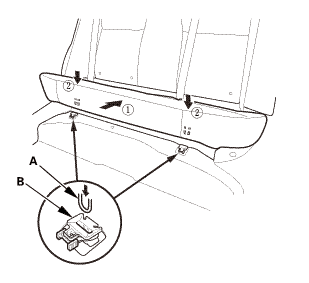
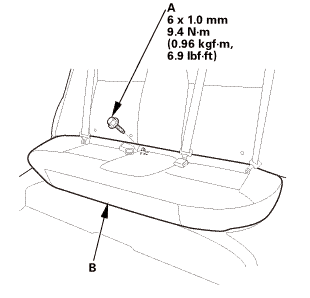
Honda Civic Service Manual: Rear Window Removal and Installation (Natural Gas models)

Removal
| 1. | Rear Seat Cushion |
|
|
|
|
|
|
| 2. | Rear Seat-Back (Natural Gas Model) |
|
|
|
|
|
|
|
|
|
| 3. | Both Rear Door Opening Seals as Needed |
|
|
|
| 4. | Both C-Pillar Trims |
|
|
|
||||||||||||
|
|
|
| 5. | Rear Shelf (Natural Gas Model) |
|
|
|
|
|
|
|
3. |
Pull out both rear seat belts (A) and the rear center seat belt (B) through the slits in the rear shelf trim (C), then remove the rear shelf trim. |

| 6. | Headliner As Needed - Rear Side |
|
|
|
| 7. | Rear Window |
|
|
|
|
|
|
|
Cutting positions
|
|

Installation
| 1. | Rear Window |
|
|
|
||||||||||||||||||||||||||||||||||
|
|
|
||||||||||||||||||
|
|
|
|
|
|
|||||||||||||||||
|
|
|
||||||||||||||||||||||
|
|
|
||||||||||||||||||
|
|
|
|
|
|
||||||||||||||||||||||||||||||||||||||||||||
|
|
|
| 2. | Headliner As Needed - Rear Side |
|
|
|
| 3. | Rear Shelf (Natural Gas Model) |
|
1. |
Slip the rear seat belts (A) and the rear center seat belt (B) through the slits in the rear shelf trim (C). |

|
|
|
|
|
|
| 4. | Both C-Pillar Trims |
|
|
|
|
|
|
||||||||||||||||||||||||
| 5. | Both Rear Door Opening Seals as Needed |
|
|
|
| 6. | Rear Seat-Back (Natural Gas Model) |
|
|
|
|
|
|
|
|
|
| 7. | Rear Seat Cushion |
|
|
|
|
|
|
| 8. | Water Leak Test |
|
|
|
 Rear Window Removal and Installation (4-door except
Natural Gas models)
832120
Removal
1.
Rear Seat Cushion
...
 Front Door Glass Run Channel Removal and Installation (4-door)
826130 LEFT
827130 RIGHT
Removal
1.
Front Door Power Window Switch Panel (4-door)
1.
Remove the power ...
See also:
Honda Civic Owners Manual. Information Display Warning and Information Messages
Indicator
Name
On/Blinking
Explanation
Message*
Parking Brake
and Brake
System Indicator
(Red)
Comes on for a few seconds when
you turn the ignition switch to ON
*1, then goes off if
the parking
brake has been released.
Comes ...


 inmmusmm(5(0.3!
 mmmyzammmymmmy

 :applypnmu
 mmin)mmin)
 12mmin)mm
 :2myasin)


 m.imim


 12mmznamm(12in)