Honda Civic Service Manual: Front Power Window Motor Removal and Installation (4-door)
744160 LEFT FRONT
744170 RIGHT FRONT

Removal
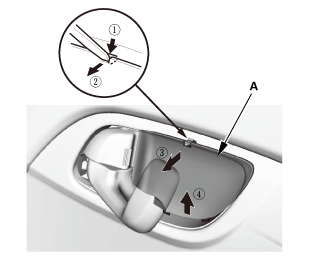
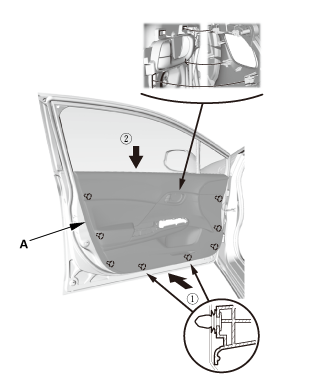
| 1. |
Front Door Power Window Switch Panel (4-door) |
|
|
|
1.
|
Remove the power window switch panel (A).
|
|
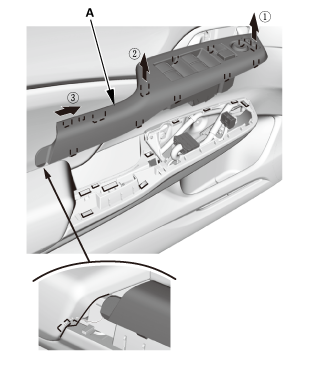
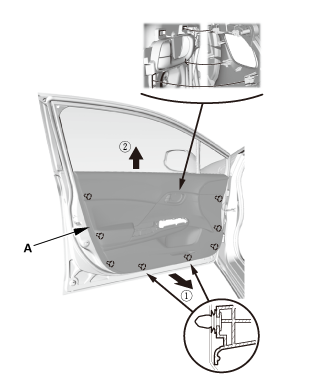
| 2. |
Front Door Panel - Driver's Side (4-Door) |
|
|
|
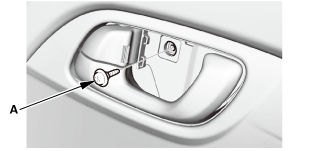
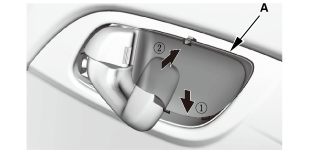
1.
|
Remove the inner handle cap (A).
|
|
|
|
|
4.
|
Remove the door panel (A).
|
|
| 3. |
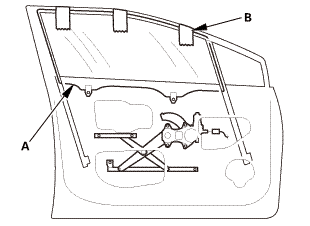
Front Door Plastic Cover (4-door) |
|

|
|
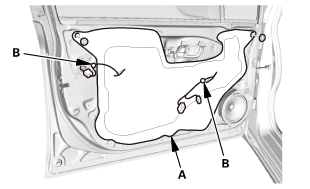
1.
|
Remove the harness clips (A).
|
|
2.
|
Remove the plastic cover (B).
|
|
| 4. |
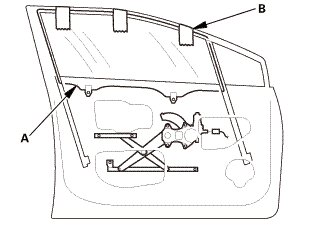
Front Door Glass - Support |
|
|
|
2.
|
Secure the glass (A) with tape (B).
|
|
|
|
|
1.
|
Remove the regulator (A).
|
|
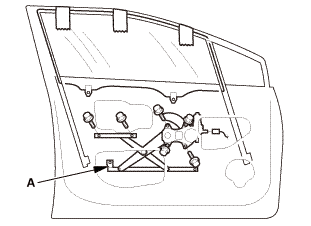
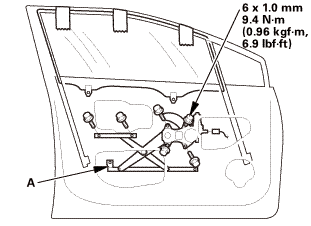
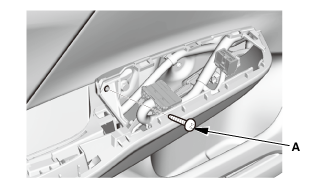
| 6. |
Front Power Window Motor |
|
|
|
1.
|
Remove the power window motor (A).
|
|

Installation
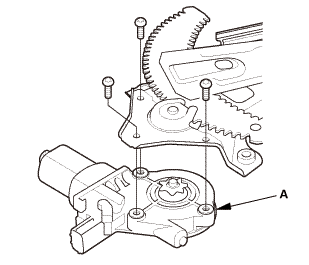
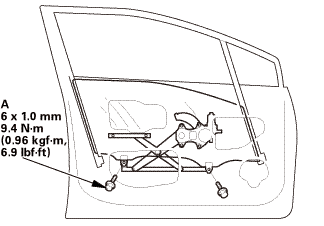
| 1. |
Front Power Window Motor |
|
|
|
NOTE: Screw threads are not tapped into the new power
window motor. Install the new motor as follows, using the
self-tapping screws provided.
|
|
1.
|
Install the power window motor onto the regulator (C)
as shown, and tighten the screws until the screw head contacts
with the linkage.
|
|
NOTE:
|
|

|
Screw in the self-tapping screws, keeping
them vertical.
|
|
|
|
Do not use an air tool or impact wrench
to install the screws.
|
|
|
|
Use only the self-tapping screws provided
with the motor.
|
|
|
|
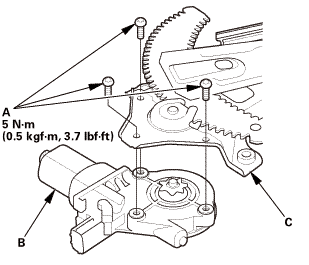
2.
|
Loosen the screws, then retighten them to the specified
torque.
|
|
|
|
|
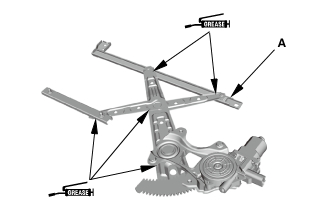
1.
|
Apply multipurpose grease to all the sliding surfaces
of the regulator (A).
|
|
|
|
|
2.
|
Install the regulator (A).
|
|
| 3. |
Front Door Glass - Support |
|
|
|
1.
|
While holding the glass (A), remove the tape (B).
|
|
|
|
|
2.
|
Install the bolts (A).
|
|
| 4. |
Front Door Plastic Cover (4-door) |
|
|
|
1.
|
Install the plastic cover (A).
|
|
2.
|
Install the harness clips (B).
|
|
| 5. |
Front Door Panel - Driver's Side (4-Door) |
|
|
|
1.
|
Install the door panel (A).
|
|
|
|
|
2.
|
Install the screw (A).
|
|
|
|
|
3.
|
Install the screw (A).
|
|
|
|
|
4.
|
Install the inner handle cap (A).
|
|
| 6. |
Front Door Power Window Switch Panel (4-door) |
|

|
|
1.
|
Install the power window switch panel (A).
|
|
| 7. |
Power Window Control Unit - Reset |
|
Resetting the power window is required when any of the following
have occurred:
|
|
|
Power window regulator replacement or repair
|
|
|
|
Power window motor replacement or repair
|
|
|
|
Glass run channel replacement
|
|
|
|
Driver's door glass replacement
|
|
|
|
Power window master switch replacement
|
|
|
1.
|
Turn the ignition switch to ON (II).
|
|
2.
|
Move the driver's window all the way down with the driver's window
DOWN switch.
|
|
3.
|
Open the driver's door.
|
|
NOTE: Steps 4-7 must be done within 5 seconds of each other.
|
|
4.
|
Turn the ignition switch to LOCK (0).
|
 armounupnwlrwindnwdawdawnswiich
|
5.
|
Push and hold the driver's window DOWN switch.
|
|
6.
|
Turn the ignition switch to ON (II).
|
|
7.
|
Release the driver's window DOWN switch.
|
|
8.
|
Repeat step 4-7 three more times.
|
|
9.
|
Wait at least 1 second.
|
|
10.
|
Confirm that AUTO UP and AUTO DOWN do not work. If AUTO UP and
DOWN work, go back to step 1.
|
|
11.
|
Move the driver's window all the way down with the driver's window
DOWN switch.
|
|
12.
|
Pull up and hold the driver's window UP switch until the window
reaches the fully closed position, then continue to hold the switch
for at least 1 second.
|
|
13.
|
Confirm that the power window control unit is reset by using
the driver's window AUTO UP and AUTO DOWN functions:
|
|
|
If the window still does not work in AUTO, repeat
the procedure several times, paying close attention
to the 5 second time limit between steps.
|
|
|
|
If the window still does not work, refer to the
master switch input test.
|
|
|
744160 LEFT FRONT
744170 RIGHT FRONT
Removal
1.
Front Door Panel (2-Door)
1.
...
Removal
1.
Battery Terminal (SRS) - Disconnection
1.
Make s ...
See also:
Honda Civic Owners Manual. VSA Operation
When VSA activates, you may notice that the
engine does not respond to the accelerator.
You may also notice some noise from the
hydraulic system. You will also see the
indicator blink.
Vehicle Stability Assist (VSA), aka Electronic
Stability Control (ESC), System
VSA may ...

 Front Power Window Motor Removal and Installation (2-door)
 Front Seat Belt Removal and Installation - Driver's Seat (2-door)