Honda Civic Service Manual: Cylinder Head Inspection for Warpage (K24Z7)

| 1. | Vehicle Lift |
|
| 2. | Splash Shield |
|
1. |
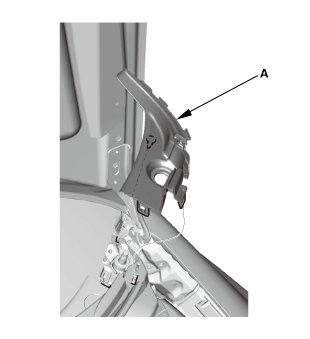
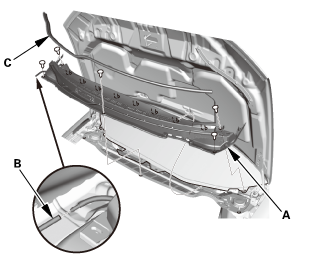
Remove the splash shield (A). |

| 3. | Radiator Cap |
|
| 4. | Radiator Coolant - Replacement |
|
|
|
| 5. | Fuel Filler Cap |
|
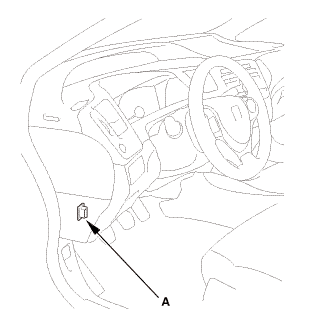
| 6. | HDS DLC - Connection |
|
|
|
| 7. | Fuel Pump Off |
|
||||||||||||||||||||||||
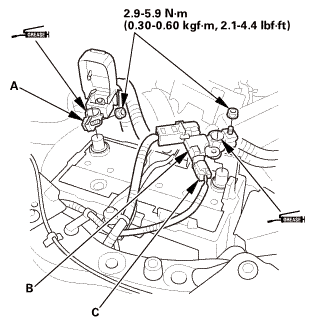
| 8. | Battery Terminal - Disconnection |
|
|
|
|||||||||||||||||||||||||||
| 9. | Fuel Pressure - Relieving |
|
|
|
|
|
|
|
|
|
|
|
|
|||||||||||||||||||||||||
| 10. | Air Cleaner Assembly |
|
|
|
| 11. | Drive Belt |
|
|
|
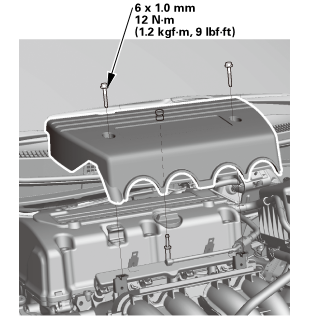
| 12. | Engine Cover |
|
|
|
| 13. | Intake Air Duct |
|
|
|
| 14. | Throttle Body - Removal |
|
|
|
|
|
|
|
|
|
| 15. | Intake Manifold Assembly |
|
|
|
|
|
|
|
|
|
| 16. | Ignition Coil Harness - Move |
|
|
|
| 17. | Fuel Injector and Rail Assembly |
|
|
|
| 18. | Injector Base Assembly |
|
|
|
| 19. | Wiper Arm Assembly |
|
|
|
| 20. | Both Side Cowl Covers |
|
|
|
| 21. | Center Cowl Cover |
|
|
|
| 22. | Under Cowl Panel |
|
|
|
| 23. | Engine Peripheral Hose - Disconnection |
|
|
|
| 24. | Rocker Arm Oil Control Valve |
|
|
|
| 25. | A/F Sensor |
|
|
|
| 26. | WU-TWC |
|
|
|
| 27. | Heater Hose - Disconnection Engine Side |
|
|
|
| 28. | Cylinder Head Peripheral Assembly |
|
|
|
| 29. | Tire and Wheel-Removal, Front Right |
|
|
|
| 30. | Ignition Coil Cover |
|
|
|
| 31. | Ignition Coil |
|
|
|
| 32. | Cylinder Head Cover |
|
|
|
| 33. | Set The Crankshaft To Top Dead Center |
|
|
|
||||||
| 34. | Cam Chain Case Peripheral Assembly |
|
|
|
| 35. | VTC Oil Control Solenoid Valve |
|
|
|
| 36. | Crankshaft Pulley |
|
|
|
| 37. | Engine Jack Support (State Of A Low Vehicle) |
|
| 38. | Upper Torque Rod |
|
|
|
| 39. | Side Engine Mount |
|
|
|
| 40. | Side Engine Mount Bracket, Engine Side |
|
|
|
| 41. | Cam Chain Case |
|
|
|
| 42. | Cam Chain Auto-Tensioner |
|
|
|
|
|
|
||||||
|
|
|
| 43. | Cam Chain Tensioner Arm and Cam Chain Guide |
|
|
|
|
|
|
| 44. | Cam Chain |
|
| 45. | Camshaft Holder |
|
|
|
|
|
|
|
|
|
| 46. | Camshaft |
|
|
|
| 47. | Rocker Arm Assembly |
|
|
|
| 48. | Cylinder Head Assembly |
|
|
|
| 49. | Rocker Arm Assembly - Disassembly |
|
NOTE: |
|
|||
|
|||
|
|||
|
|||
|
|||
|
 assemblyna.acm,na.na.na.handshafy

| 1. | Camshaft - Inspection |
|
|
|
||||||||||||||||||
|
3. |
Zero the dial indicator against the end of the camshaft, then push the camshaft back and forth, and read the end play. If the end play is beyond the service limit, replace the cylinder head and recheck. If it is still beyond the service limit, replace the camshaft. |
|||||||||
|
||||||||||

|
4. |
Loosen the camshaft holder bolts two turns at a time, in a crisscross pattern. Then remove the camshaft holders from the cylinder head. |
|
5. |
Lift the camshafts out of the cylinder head, and wipe them clean, then inspect the lift ramps. Replace the camshaft if any lobes are pitted, scored, or excessively worn. |
|
6. |
Clean the camshaft journal surfaces in the cylinder head, then set the camshafts back in place. Place a plastigage strip across each journal. |
|
7. |
Install the camshaft holders, then tighten the bolts to the specified torque as shown in step 1. |
|
8. |
Remove the camshaft holders. Measure the widest portion of plastigage on each journal: |
|||||||||||||
|
||||||||||||||
|
||||||||||||||

|
|
|
|||||||||||||||||||||||
|
10. |
Measure cam lobe height. |
|||||||||||||
|
Cam Lobe Height Standard (New):
|
||||||||||||||
|
||||||||||||||
 mm
mm
| 2. | Cylinder Head - Inspection for Warpage |
|
1. |
Check the cylinder head for warpage. Measure along the edges, and three ways across the center: |
|||||||||
|
||||||||||
|
||||||||||
|
||||||||||


| 1. | Rocker Arm Assembly - Reassembly |
|
NOTE: |
|
|||
|
|||
|
|||
|
|||
|
|||
|
 assemblyna.acm,na.na.na.handshafy
| 2. | Set The Crankshaft To Top Dead Center |
|
|
|
| 3. | Cylinder Head Assembly |
|
|
|
|
|
|
|
|
|
|
|
|
|
|
|
||||||
| 4. | Rocker Arm Assembly |
|
|
|
||||||||||||||||||||
|
|
|
||||||||||||
| 5. | Camshaft |
|
|
|
| 6. | Camshaft Holder |
|
|
|
|
|
|
||||||||||||
| 7. | Cam Chain |
|
|
|
|
|
|
|
|
|
| 8. | Cam Chain Tensioner Arm and Cam Chain Guide |
|
|
|
|
|
|
| 9. | Cam Chain Auto-Tensioner |
|
|
|
||||||
|
|
|
|
|
|
|
|
|
| 10. | Cam Chain Case |
|
|
|
|||||||||||||||||||||||||||
|
|
|
|||||||||||||||||||||
|
6. |
Install the spacer (A), then install a new O-ring (B) on the chain case. Set the edge of the chain case (C) to the edge of the oil pan (D), then install the chain case on the engine block (E). Wipe off the excess liquid gasket on the oil pan and the chain case mating area. |
|||||||||||||
|
NOTE: |
||||||||||||||
|
||||||||||||||
 tommi2mmu....

| 11. | Side Engine Mount Bracket, Engine Side |
|
|
|
| 12. | Side Engine Mount |
|
|
|
| 13. | Transmission Mount - Loosen |
|
|
|
| 14. | Lower Torque Rod Mounting Bolt - Loosen |
|
|
|
| 15. | Side Engine Mount - Tighten |
|
|
|
| 16. | Transmission Mount - Tighten |
|
|
|
| 17. | Lower Torque Rod Mounting Bolt - Tighten |
|
|
|
| 18. | Upper Torque Rod |
|
|
|
| 19. | Crankshaft Pulley |
|
|
|
|
|
|
| 20. | VTC Oil Control Solenoid Valve |
|
|
|
||||||||||||||||||||
| 21. | Cam Chain Case Peripheral Assembly |
|
|
|
| 22. | Valve Clearance - Adjustment |
|
|
|
|
2. |
Select the correct feeler gauge for the valve clearance you are going to check. |
|||||||||
|
||||||||||

|
|
|
|
|
|
|||||||||||||||
|
|
|
|
|
|
|
|
|
| 23. | Cylinder Head Cover |
|
|
|
||||||||||||
|
|
|
||||||||||||
|
|
|
|
|
|
|||||||||||||||||
| 24. | Ignition Coil |
|
|
|
| 25. | Ignition Coil Cover |
|
|
|
| 26. | Cylinder Head Peripheral Assembly |
|
|
|
| 27. | Heater Hose - Reconnection Engine Side |
|
|
|
| 28. | WU-TWC |
|
|
|
| 29. | A/F Sensor |
|
|
|
| 30. | Rocker Arm Oil Control Valve |
|
|
|
| 31. | Engine Peripheral Hose - Reconnection |
|
|
|
| 32. | Under Cowl Panel |
|
|
|
| 33. | Center Cowl Cover |
|
|
|
| 34. | Both Side Cowl Covers |
|
|
|
| 35. | Wiper Arm Assembly |
|
|
|
| 36. | Injector Base Assembly |
|
|
|
| 37. | Fuel Injector and Rail Assembly |
|
|
|
| 38. | Ignition Coil Harness - Move |
|
|
|
| 39. | Intake Manifold Assembly |
|
|
|
|
|
|
|
|
|
| 40. | Throttle Body - Installation |
|
|
|
|
|
|
|
|
|
| 41. | Intake Air Duct |
|
|
|
| 42. | Drive Belt |
|
|
|
| 43. | Air Cleaner Assembly |
|
|
|
| 44. | Tubes, Hoses, and Connectors After Installation Check |
|
| 45. | Fuel Filler Cap |
|
| 46. | Battery Terminal - Reconnection |
|
|
|
|||||||||||||||||||
| 47. | HDS DLC - Connection |
|
|
|
| 48. | Fuel Pump On |
|
||||||||||
| 49. | Fuel Line Leak Check |
|
| 50. | Radiator Coolant - Replacement |
|
1. |
Follow the chart and pour coolant into the radiator up to the base of the filler neck. |
|||||||||||||||||||||||||||||||||||||
|
NOTE: |
||||||||||||||||||||||||||||||||||||||
|
||||||||||||||||||||||||||||||||||||||
|
||||||||||||||||||||||||||||||||||||||
|
*: When you want to winterize the coolant with the minimum amount of coolant change but the current coolant concentration in the vehicle is unknown, you must drain all coolant from the cooling system. |
||||||||||||||||||||||||||||||||||||||
|
||||||||||||||||||||||||||||||||||||||
|
||||||||||||||||||||||||||||||||||||||
|
||||||||||||||||||||||||||||||||||||||
|
||||||||||||||||||||||||||||||||||||||

| 51. | Engine Cover |
|
|
|
| 52. | Tire and Wheel-Installation, Front Right |
|
|
|
||||||
| 53. | Splash Shield |
|
1. |
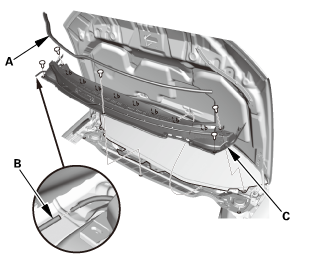
Install the splash shield (A). |

| 54. | Warm Up The Engine |
|
| 55. | Idle Speed - Inspection |
|
||||||||||||||||||||||
| 56. | CKP Pattern Clear/CKP Pattern Learn |
|
| 57. | Ignition Timing - Inspection |
|
|
|
|
|
|
||||||||||||||||
| 58. | Maintenance Minder Reset |
|
 Cylinder Head
...
 Cylinder Head Inspection for Warpage (R18A9)
1.
Fuel Pressure - Relieving (Between the engine and the manual shut-off
valve) (Natural Gas Model)
Compressed natural gas is flammable and ...
See also:
Honda Civic Service Manual. Front Door Regulator Removal and Installation (4-door)
Removal
1.
Front Door Power Window Switch Panel (4-door)
1.
Remove the power window switch panel (A).
2.
...




 vnm
vnm




 12x1mm


 1aah(jaal0a


 , skip it
and continue the torque sequence.


 szconn
 2.5mm
2.5mm


 (21m,mm


 .min)
.min)
 replace.(s.nm,

 -.smmn-m
 :2mmn-m
 mmreplace.mm
 1aah(jaal0a


 sxmmmn-nl
 22am...(3

 22mm)2222
 1.122
1.122


 isum
isum

 vnm
vnm
 mminmuan
